Starting an Automatic Transmission Vehicle
Starting an automatic transmission vehicle is straightforward․ Ensure the vehicle is in park (P), depress the brake pedal, and turn the ignition key or press the start button․ Once the engine runs smoothly, release the brake gently to begin moving forward․ Remember to check your surroundings before moving․
Pre-Driving Checks and Preparations
Before starting your journey, several crucial pre-driving checks are necessary to ensure a safe and efficient driving experience; Begin by adjusting your driver’s seat to a comfortable position that allows for easy reach of the pedals and steering wheel․ Proper seat adjustment is crucial for maintaining control and preventing fatigue during longer drives․ Next, adjust your side and rearview mirrors to provide optimal visibility of your surroundings, minimizing blind spots․ Always fasten your seatbelt before starting the engine; this is a fundamental safety precaution that significantly reduces the risk of injury in the event of a collision․ Finally, take a moment to scan your dashboard for any warning lights that may indicate potential issues with your vehicle․ Addressing these promptly can prevent more significant problems later․ A quick check of your fuel gauge will avoid unexpected stops due to running out of fuel․ These simple yet vital steps contribute significantly to a safe and enjoyable driving experience․
Understanding the Gear Selector and its Positions
The gear selector in an automatic transmission vehicle is a crucial component that controls the car’s movement․ Understanding its various positions is essential for safe and efficient operation․ The most common positions include Park (P), Reverse (R), Neutral (N), and Drive (D)․ ‘Park’ locks the transmission, preventing the vehicle from rolling․ ‘Reverse’ engages the reverse gear, allowing backward movement․ ‘Neutral’ disengages the transmission from the engine, allowing the vehicle to be towed or pushed․ ‘Drive’ is the standard driving position, enabling forward motion․ Some automatic transmissions also include additional positions like Low (L) or 1, 2, and 3, which can provide more control, particularly on steep inclines or during slow driving situations․ Familiarizing yourself with these positions and their functions is crucial before operating an automatic vehicle․ Improper use of the gear selector can lead to unexpected vehicle movement, potentially causing accidents or damage to the transmission itself․ Consult your vehicle’s owner’s manual for specific instructions and details regarding the gear selector in your particular model․ Understanding these functions is key to safe and confident driving․

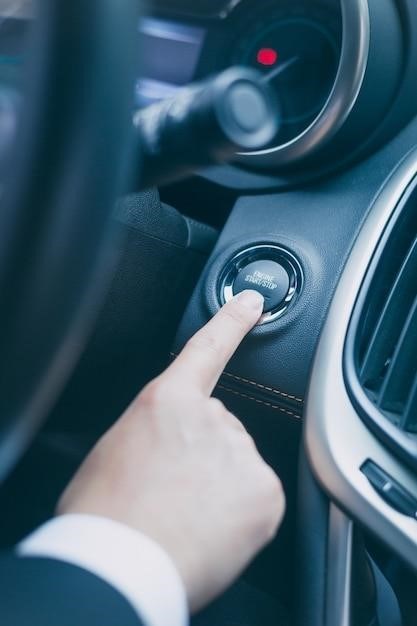
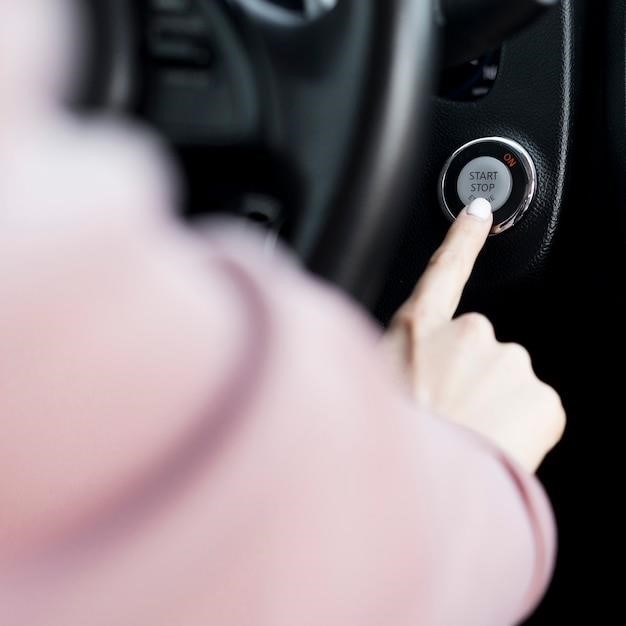
The Starting Procedure
With the automatic transmission in Park (P) and your foot firmly on the brake, turn the ignition key or press the start button․ Once the engine starts, gently release the brake pedal and proceed carefully․
Step-by-Step Guide to Starting the Engine
First, adjust your seat and mirrors for optimal visibility and ensure your seatbelt is fastened․ Then, make sure the gear selector is in the “Park” (P) position․ This is crucial for safety and prevents accidental movement․ Next, firmly depress the brake pedal with your right foot․ This is a vital step, as many modern vehicles incorporate a safety mechanism that prevents engine starting unless the brake is engaged․ This prevents unintended acceleration and enhances safety․ Now, insert the key into the ignition or press the start button, depending on your vehicle’s design․ Turn the key to the “On” position or press the start button․ Listen for the engine to start; if it doesn’t, try again after a short pause․ Once the engine is running, check the dashboard for any warning lights․ If everything appears normal, you’re ready to proceed to the next step⁚ shifting into “Drive” (D) and beginning your journey․ Remember always to double-check your surroundings before moving your vehicle․
Initial Acceleration and Movement
With the engine running and the gear selector in “Drive” (D), gently release the brake pedal while simultaneously applying slight pressure to the accelerator pedal․ The car will begin to move forward․ Avoid sudden acceleration; instead, gradually increase the pressure on the accelerator to smoothly increase speed․ It’s important to maintain awareness of your surroundings, checking your mirrors and blind spots frequently․ Before making any turns or lane changes, signal your intentions clearly using your turn signals, and always ensure the maneuver is safe to execute․ Observe traffic laws and maintain a safe following distance from other vehicles․ In areas with pedestrians or cyclists, reduce speed and proceed with extra caution․ Remember that smooth acceleration and mindful driving are crucial for safe and efficient operation of an automatic transmission vehicle․ Practice these techniques regularly to build confidence and proficiency in driving․
Driving Dynamics
Automatic transmissions simplify driving, offering smooth acceleration and effortless gear changes․ Focus on safe driving practices, such as maintaining a safe following distance and using signals appropriately․ Efficient driving techniques, like gradual acceleration and consistent speeds, enhance fuel economy․
Safe Driving Practices with Automatic Transmissions
While automatic transmissions simplify driving, safe practices remain crucial․ Maintaining a safe following distance is paramount, allowing ample reaction time to unexpected events․ Always signal your intentions clearly before changing lanes or turning, ensuring other drivers understand your maneuvers․ Avoid sudden acceleration or braking, promoting smoother transitions and enhanced control․ Regularly check your mirrors and blind spots, confirming the safety of lane changes and turns․
Obeying speed limits and traffic laws is non-negotiable, preventing accidents and ensuring responsible driving․ Stay alert and avoid distractions, such as mobile phones or other devices, maintaining focus on the road and surrounding environment․ Adjust your driving to weather conditions, reducing speed and increasing following distance in adverse situations like rain or snow․ Familiarize yourself with your vehicle’s features, such as anti-lock brakes (ABS) and electronic stability control (ESC), understanding how they enhance safety․ Remember, responsible driving habits significantly reduce the risk of accidents, regardless of the type of transmission․
Efficient Driving Techniques
Efficient driving with an automatic transmission focuses on minimizing fuel consumption and maximizing performance․ Smooth acceleration and deceleration are key; avoid aggressive starts and sudden braking․ Maintain a consistent speed whenever possible, reducing the need for frequent acceleration and deceleration cycles․ Anticipate traffic flow, adjusting speed to avoid unnecessary braking and acceleration․ Use cruise control on highways to maintain a steady speed and reduce fuel consumption․ Avoid idling for extended periods; turn off the engine if you’ll be stopped for more than a minute․
Regular vehicle maintenance is crucial for optimal fuel efficiency․ Ensure proper tire inflation; under-inflated tires increase rolling resistance and reduce fuel economy․ Keep your vehicle well-maintained with regular tune-ups and fluid changes․ Avoid carrying unnecessary weight; extra weight reduces fuel efficiency․ Plan your routes to avoid congestion and unnecessary stops, optimizing your travel time and fuel consumption․ Driving at moderate speeds generally provides the best fuel economy, particularly in city driving․ Remember, consistent, smooth driving habits contribute significantly to improved fuel efficiency and extended vehicle lifespan․
Troubleshooting and Maintenance
Regular fluid checks and changes are crucial for optimal automatic transmission performance․ Address any unusual noises or shifting problems promptly․ Consult a mechanic for significant issues; neglecting problems can lead to costly repairs․
Common Issues and Solutions
One frequent problem is delayed or rough shifting․ This often indicates low transmission fluid, a failing filter, or worn internal components․ Regular fluid and filter changes, according to the manufacturer’s recommendations, are preventative measures․ If the issue persists, a professional inspection is necessary to diagnose the specific cause․ A slipping transmission, where the engine revs but the car doesn’t accelerate properly, usually points to low fluid levels, a worn clutch pack, or problems with the torque converter․ Again, prompt attention from a qualified mechanic is crucial to avoid further damage․ Unusual noises, such as whining, grinding, or clunking, emanating from the transmission area could signal worn bearings, gears, or other internal parts․ Ignoring these sounds can lead to catastrophic transmission failure․ Lastly, complete transmission failure, resulting in the inability to shift gears or move the vehicle, requires immediate professional attention․ This could stem from various problems, including severe fluid leaks, complete clutch pack failure, or major internal damage․